Many Mac owners complained that they couldn’t use their AirPods with Zoom. That’s a big problem, especially if you’re using Zoom for work-related purposes. They often ask, “Why Is AirPods Not Working With Zoom?”
You may be unable to use your Macbook’s built-in speakers because other colleagues are working around you. Or you are discussing sensitive information and want to prevent eavesdropping. This guide will show you how to properly troubleshoot why your AirPods not working with Zoom.
Why AirPods Are Not Working With Zoom
How to Disconnect Your AirPods From Other Devices
First, unpair your AirPods from any other devices they may be connected to. If your earphones are connected to multiple devices, interference may occur. The quickest way to do this is simply to disable the Bluetooth feature on the other devices. This way, your AirPods will only connect to your Mac (the only device with active Bluetooth).
Set up your AirPods in Zoom’s audio settings
To use your AirPods with Zoom, you’ll need to set up the earbuds directly in Zoom’s audio and speaker settings.
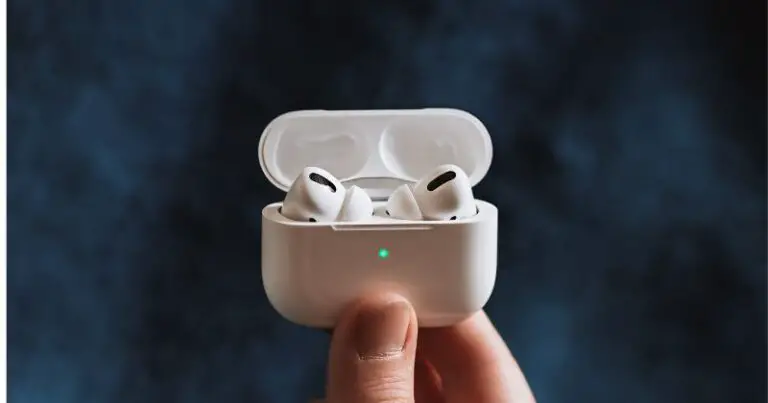
Connect your AirPods to your Macbook and make sure the pairing was successful. Press the pairing button on the back of the AirPods case. Wait for the light to start flashing white.
Go to Apple → System Preferences .
Click the Bluetooth icon and make sure your AirPods are visible in your connected devices list.
Launch Zoom and click on Zoom.us (top left corner).
Then select Settings.
Click Audio .
Under Speakers and Microphone , select your Airpods .
This indicates Zoom is using your AirPods to render audio and record audio input.
Note: You can set Zoom to use two different devices for audio.
For example, you can use an external microphone to record audio while using your Airpods as speakers. Just select the devices you want to use under Speaker, and Microphone settings.
Check This Out Next: The Evolution of Apple AirPods
Check this video: Why Is AirPods Not Working With Zoom? (Causes & Fixes)
Allow Zoom to access your microphone
Make sure you set up the correct permissions on your Mac to allow Zoom to access your microphone (AirPods). Navigate to your operating system permissions and allow Zoom to use your microphone.
It’s worth noting that macOS will now prompt you to authorize Zoom to use your microphone and camera. Without these permissions, Zoom cannot access your microphone and camera.
- Click on the Apple menu .
- Go to System Preferences .
- Then click Security & Privacy .
- Select the Privacy tab .
- Click the lock icon to unlock setting changes.
- Select the microphone .
- Check the Zoom box to allow the program to use your microphone.
You can then set your AirPods to act as a microphone as previously described.
Delete your Zoom folder under Application Support
If the problem persists, try deleting the Zoom folder under Application Support.
To access the library, press the option key and click on the Go menu while holding the option key.
Go to Library → Application Support → select Zoom.
Sometimes this folder can get corrupted. Deleting should fix the problem.
However, if the problem persists, try uninstalling Zoom after deleting this folder. Download and install the program again. Check if you can now use your AirPods on Zoom.
Additional Solutions
First of all, make sure your air pods are charged enough. If not, put both air pods into the charging case and charge for at least 10 minutes to direct the wall plug using Apple’s original lightning cable. Otherwise, you can reset air pods to connect with Mac.
In this case, air pods disconnected from Mac automatically and connected to another apple device. To prevent this auto-pairing tip, turn off Bluetooth on your nearby iPhone iPad and enjoy an uninterrupted Bluetooth connection to your air pods.
Also, sometimes reset air pods are required because you are connecting with a Mac for the first time or paired with other devices. Here’s my tutorial on why your air pods won’t reset and pair with Mac.
Let’s start with the pairing or setup process on my Mac:
- turn on Bluetooth on your Mac. Then press and hold on the back button of the charging case with the lid open on air pods. Your air pods flash white amber light, which means your air pods reset successfully.
- Now open the Bluetooth preferences on Mac from the top, and have a logo. Click on System Preferences and see your air pods in the Bluetooth list and click on to connect successfully.
- Now go back to System Preferences and click on the sound option. Select your pair of air pods pro under the output section, and check the audio balance between the left and right air pod.
If this setting is not correct, then your air pods are connected but no sound on one of your air pods. Also set the output volume level. In the same way Set Input microphone volume level and test the sound effect on your Mac System Preferences.
Now your air pods are easy to use on any software running on your Mac just like zoom app or Zoom web while used in the browser to check speaker and microphone settings on the Zoom app.
Open the Zoom app on your Mac screen and log into your zoom for zoom Mac app. From the top Apple Mac menu, click on zoom.us and the preferences option. Next, under the audio section, check output volume and input volume and set the slider to maximum.
If the slider is not accessible, then manage it from your max audio preference settings. Remove the input and output volume limitations and recheck the Zoom preferences settings.
Hope it will work. If it still works then allow the microphone by clicking on Join Audio and use your Bluetooth headphone as a microphone during Zoom meeting.
By default, the Zoom app doesn’t turn on the microphone automatically on a screen. Here, my Zoom meeting doesn’t allow me to start the microphone but the speaker does. Check the microphone privacy for the Zoom app on Mac.
Go to the Apple Mac System Preference from the top Mac menu. Next, quick security and privacy settings. From the left side of the window, select the microphone option and select the zoom app on Mac, force quit the Zoom app, and relaunch on your Mac to see if the microphone issue is fixed or not.
If none of the solutions is working for you then follow some troubleshooting on the problem with the Zoom app only. To identify the specific app related issue.
I recommend using the Apple voice memo on Mac to start recording using the AirPods microphone. If it’s working fine. Then delete the Zoom folder from the application support folder.
Open Finder on Mac from the top Mac menu, click on go from the top menu and go to folder and enter the folder path given on-screen or copy from the video description and click on the Go button. Now search zoom as a folder and delete that folder.
Now relaunch zoom app on Mac, and I hope it will fix the issue. If not yet then try to remove and reinstall the Zoom app on Mac. In some cases, a restart is required to rebuild the app folder.
Some other tips on Mac microphone not working with Zoom, then attend the meeting on zoom on a web browser or Zoom app is available for a mobile device.
Connecting the AirPods to the MacBook
As a reminder, there are so many things you can do with the AirPods. One can use the AirPods to listen to music, use Siri or take calls while they are nearby and can be used with the Mac. However, once you’ve paired your AirPods with your iPhone, you should know a few things before pairing them with your MacBook.
Your AirPods are ready to use with your Mac if you’ve already connected them to your iPhone (your Mac must support Handoff and you must be signed in to iCloud with the same Apple ID).
Here are the steps you need to follow when your AirPods are paired with iPhone before connecting them to your MacBook:
- Take the AirPods out of their case.
- Choose AirPods from the Sound Controls option in your Mac’s menu bar.
- If your AirPods aren’t connected to your iPhone, you can connect them to your Mac.
How to connect AirPods to iPad?
Open the AirPods case cover with your AirPods.
When the status light is flashing white, you can either press and hold the setup button on the back of the case or the noise control button (AirPods Max only).
Choose Apple menu > System Preferences, then Bluetooth on your Mac.
In the Devices list, choose AirPods.
If your AirPods support it, click Enable to use Siri with your AirPods by saying “Hey Siri.”
When asked how you’d like to improve Siri and Dictation, choose one of the following options:
Audio recordings to be shared: Allow Apple to save the audio recordings of Siri and Dictation interactions on this Mac by clicking Share Audio Recordings. Apple may examine a sample of the stored audio data.
Audio recordings shouldn’t be shared: Choose the Not Now menu.
Check or uncheck the “Improve Siri and Dictation” box in the Analytics and Improvements section of the privacy options when you click Share Audio Recordings.
Note, however, that you can delete the audio recordings from Apple’s servers at any time; For more info, see Clear Siri and Dictation history.
Change AirPods’ noise control mode from Mac
You can toggle between noise-canceling and transparency modes when listening to audio from your Mac with AirPods Pro or AirPods Max.
After you click the AirPods Pro or AirPods Max icon in the menu bar or Control Center, choose one of the following options:
- Outside noise is blocked by noise cancellation.
- The transparency lets you hear what’s going on around you.
- Off: Both noise cancellation and transparency are disabled.
If the AirPods Pro or AirPods Max icon isn’t in the menu bar, choose Apple menu > System Preferences, then click Sound. Turn on Show Sound in the Menu Bar. You can use the drop-down menu to choose whether the sound is always displayed in the menu bar or only when it is active.
Fix zoom audio issues on the PC: Why Is AirPods not working with Zoom
If you are holding a Zoom meeting on your PC and there is no sound, this can have various causes. You can try the following:
Clear browser cache
If you wonder why Is AirPods not working with Zoom, clear the browser cache. If you are using Zoom in the browser, the audio issues may be caused by the browser. When you visit different websites, all temporary files are stored in your browser cache.
But your browser’s cache and cookies can sometimes block Zoom’s audio scripts. You can read about how to clear the cache for different browsers below:
- Clear cache in Chrome
- Clear cache in Firefox
- Clear cache in Safari
- Clear cache in Edge
Selecting speakers in Zoom
If you have multiple speakers connected to your computer, Zoom may be using the wrong speaker. In this case, the audio signal is sent to speakers that you are not using.
But you can easily fix that. During a meeting, click the arrow next to the microphone icon in the bottom left, then select the correct speaker under “Speakers.”
Read This Article Next: AirPods Blinking Green: Causes & How To Fix Them
Conclusion- Why Is AirPods Not Working With Zoom

Airpods are great gadgets to use when listening to music or conversing with people through phone or video calls. But you may often face the problem called, Why Is AirPods Not Working With Zoom? In this article, we have discussed how to connect your AirPods for zoom meetings and how to fix it if you wonder why Is AirPods not working with Zoom.
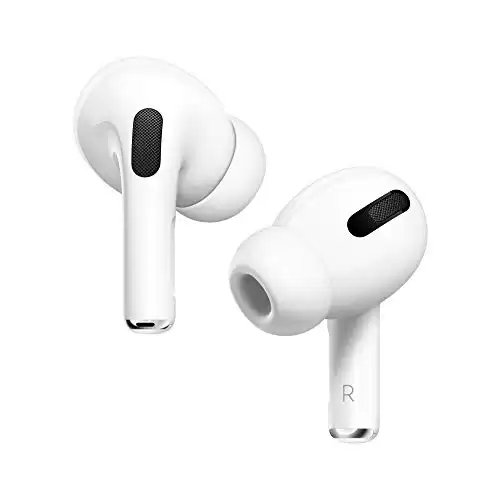
Apple AirPods

Simply take them out of the charging case, put them in your ears, and they connect immediately - immersing you in rich, high-quality sound.
Product SKU: B085WSFK3D
Product Brand: Apple AirPods
4.6
Pros
- Very good sound and the noise cancellation reduces ambient noise
- Fit to ears
Cons
- Microphone quality is not too good
- Needs a better charge life
Apple AirPods Pro

A custom speaker driver, a high dynamic range amplifier, and the H1 chip work together to produce superior sound in a compact design.
Product SKU: B09JQMJHXY
Product Brand: Apple AirPods Pro
4.7
Pros
- Great sound and microphone quality
- Comfortable to wear
- Noise cancelling works well
Cons
- Need to improve battery life
- The charging case is flimsy


